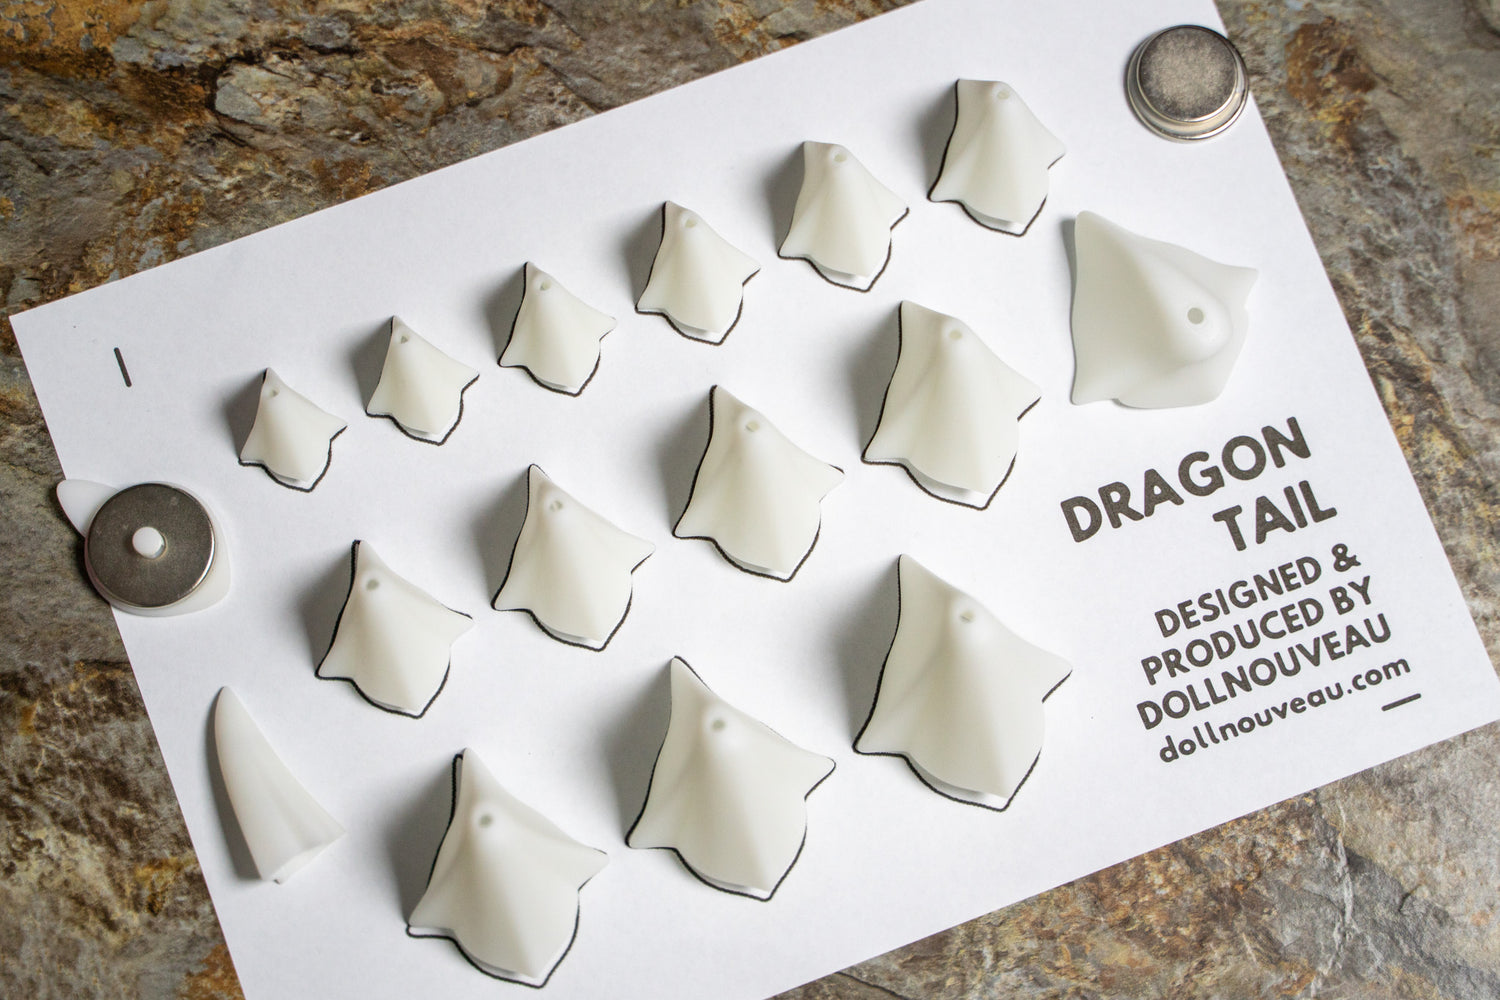
1 /
Check the parts with the dimension sheet.
If there is no missing, you can paint it now!
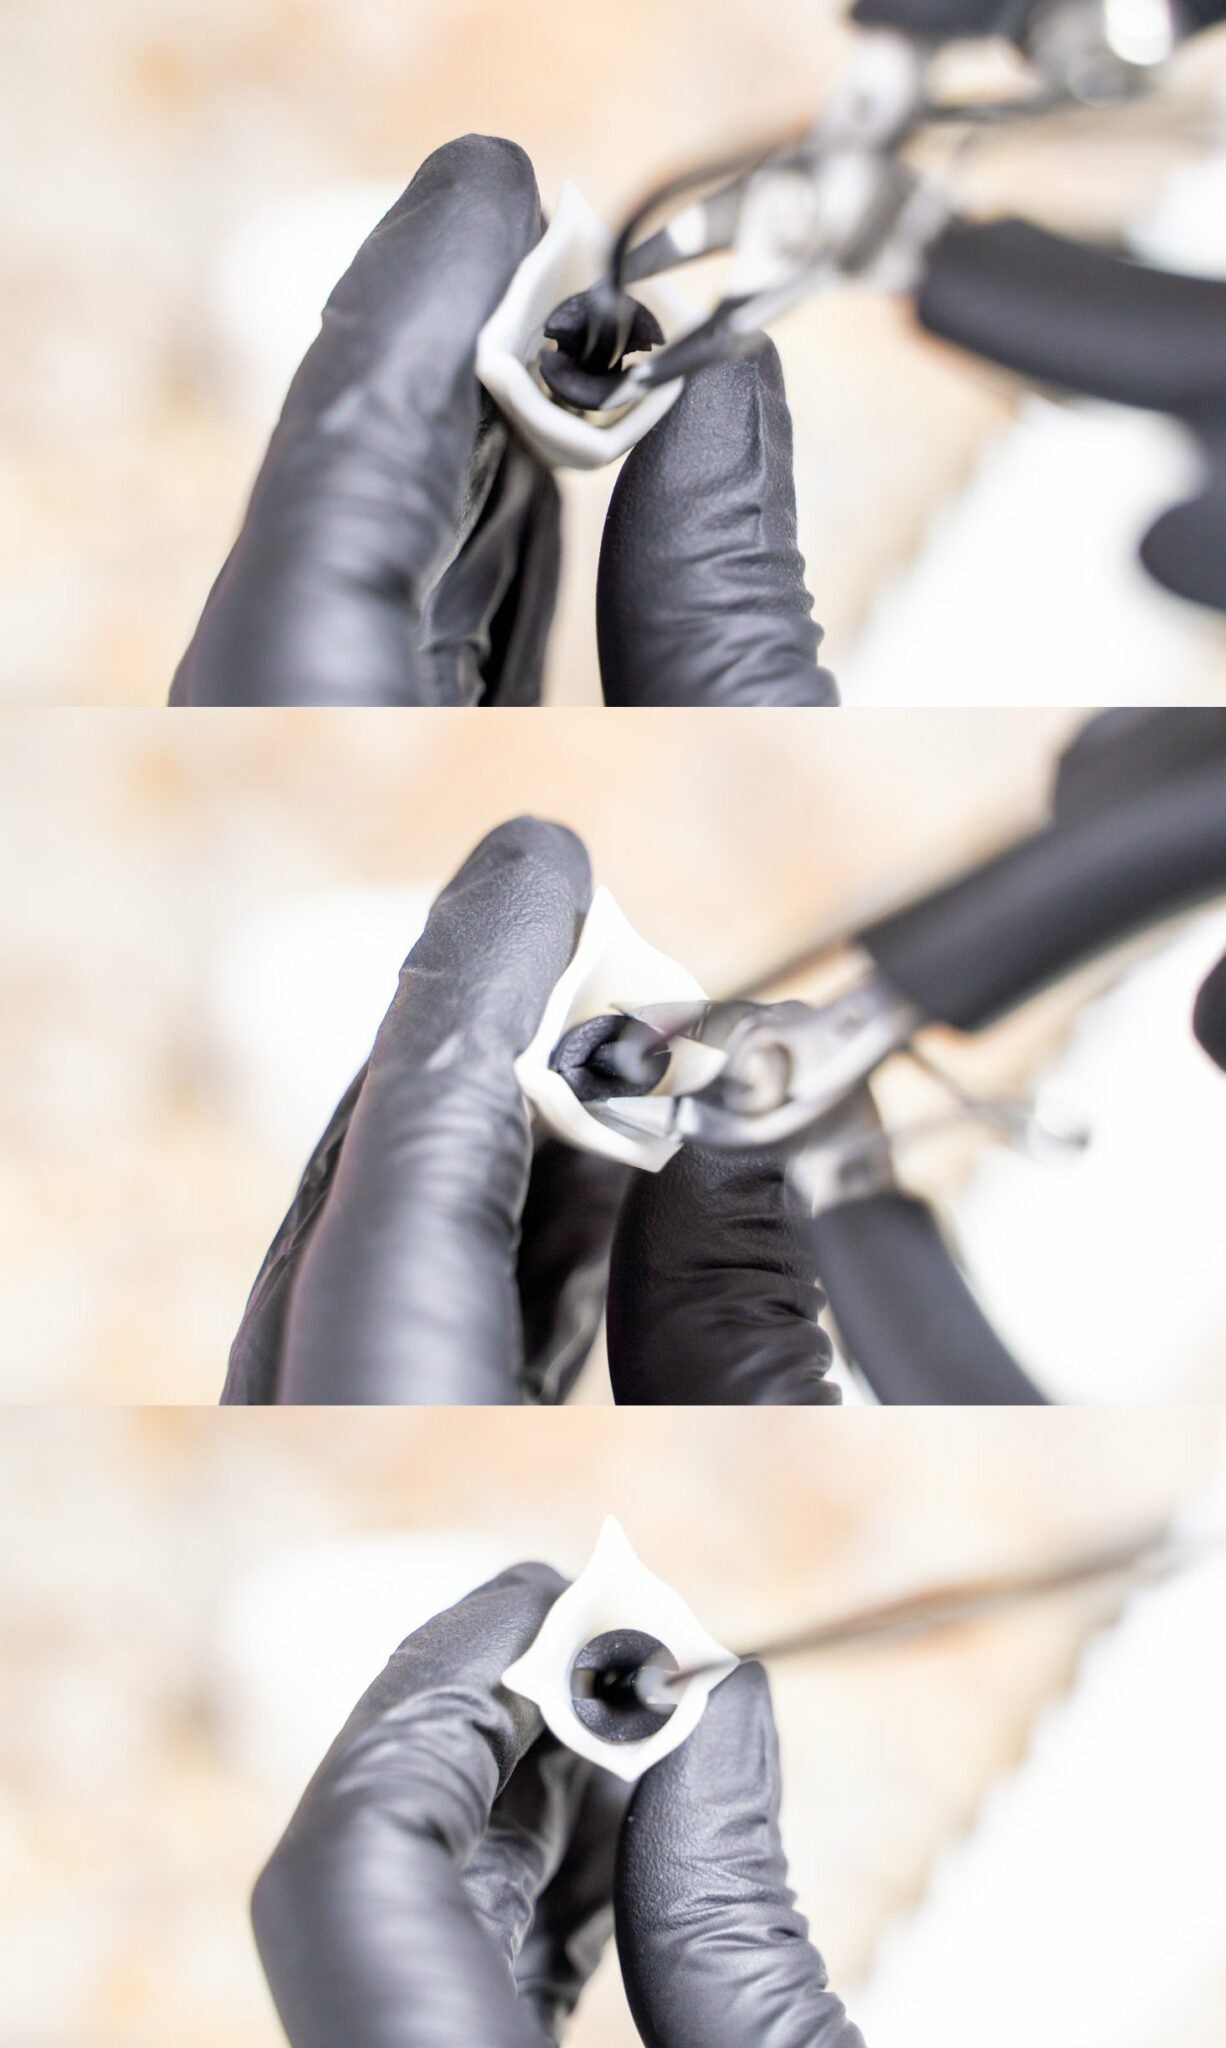
2 /
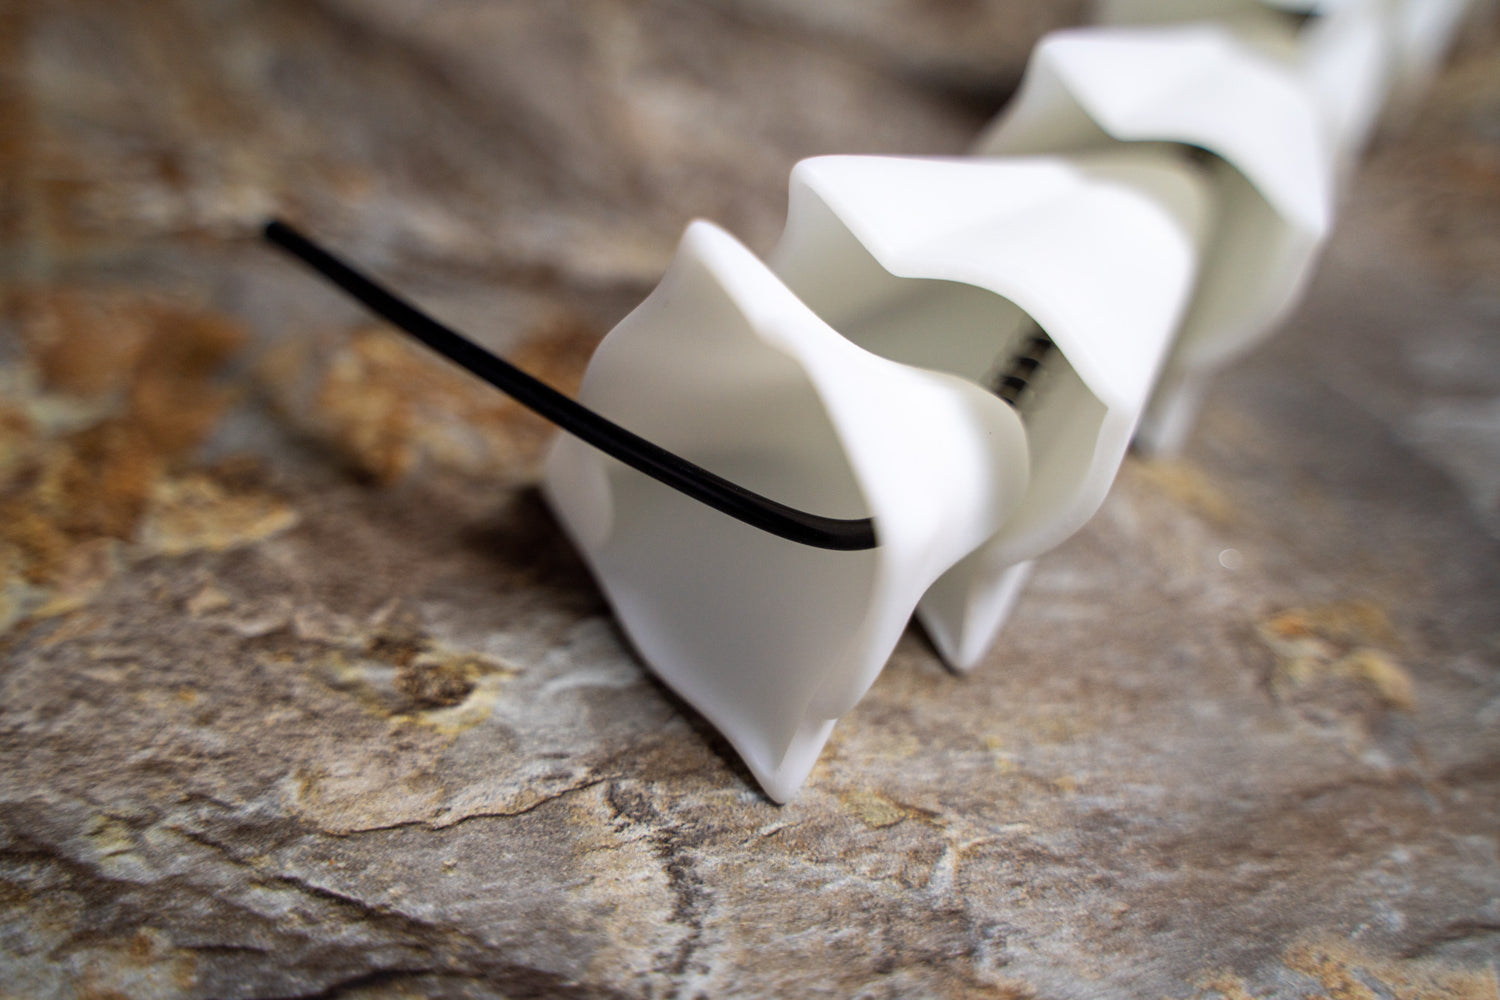
Start to assembly from the end of the tail. Use the plier to put the black piece (connected with the wire) into the tail. Please follow the photos shown, and the part should level the direction.
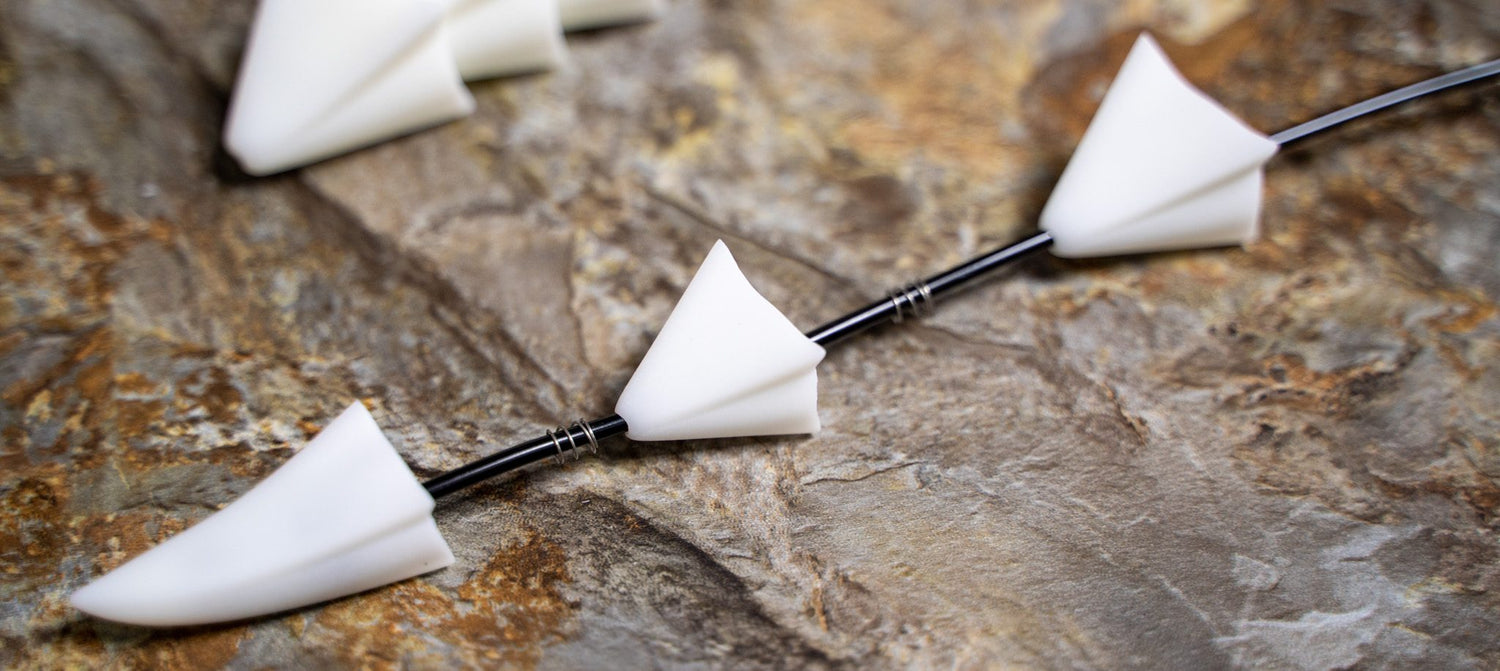
3 /
Put the tail parts and the spring one by one.

Step for Young Dragon Tail
Download Full Image

Step for Dragon Tail
Download Full Image
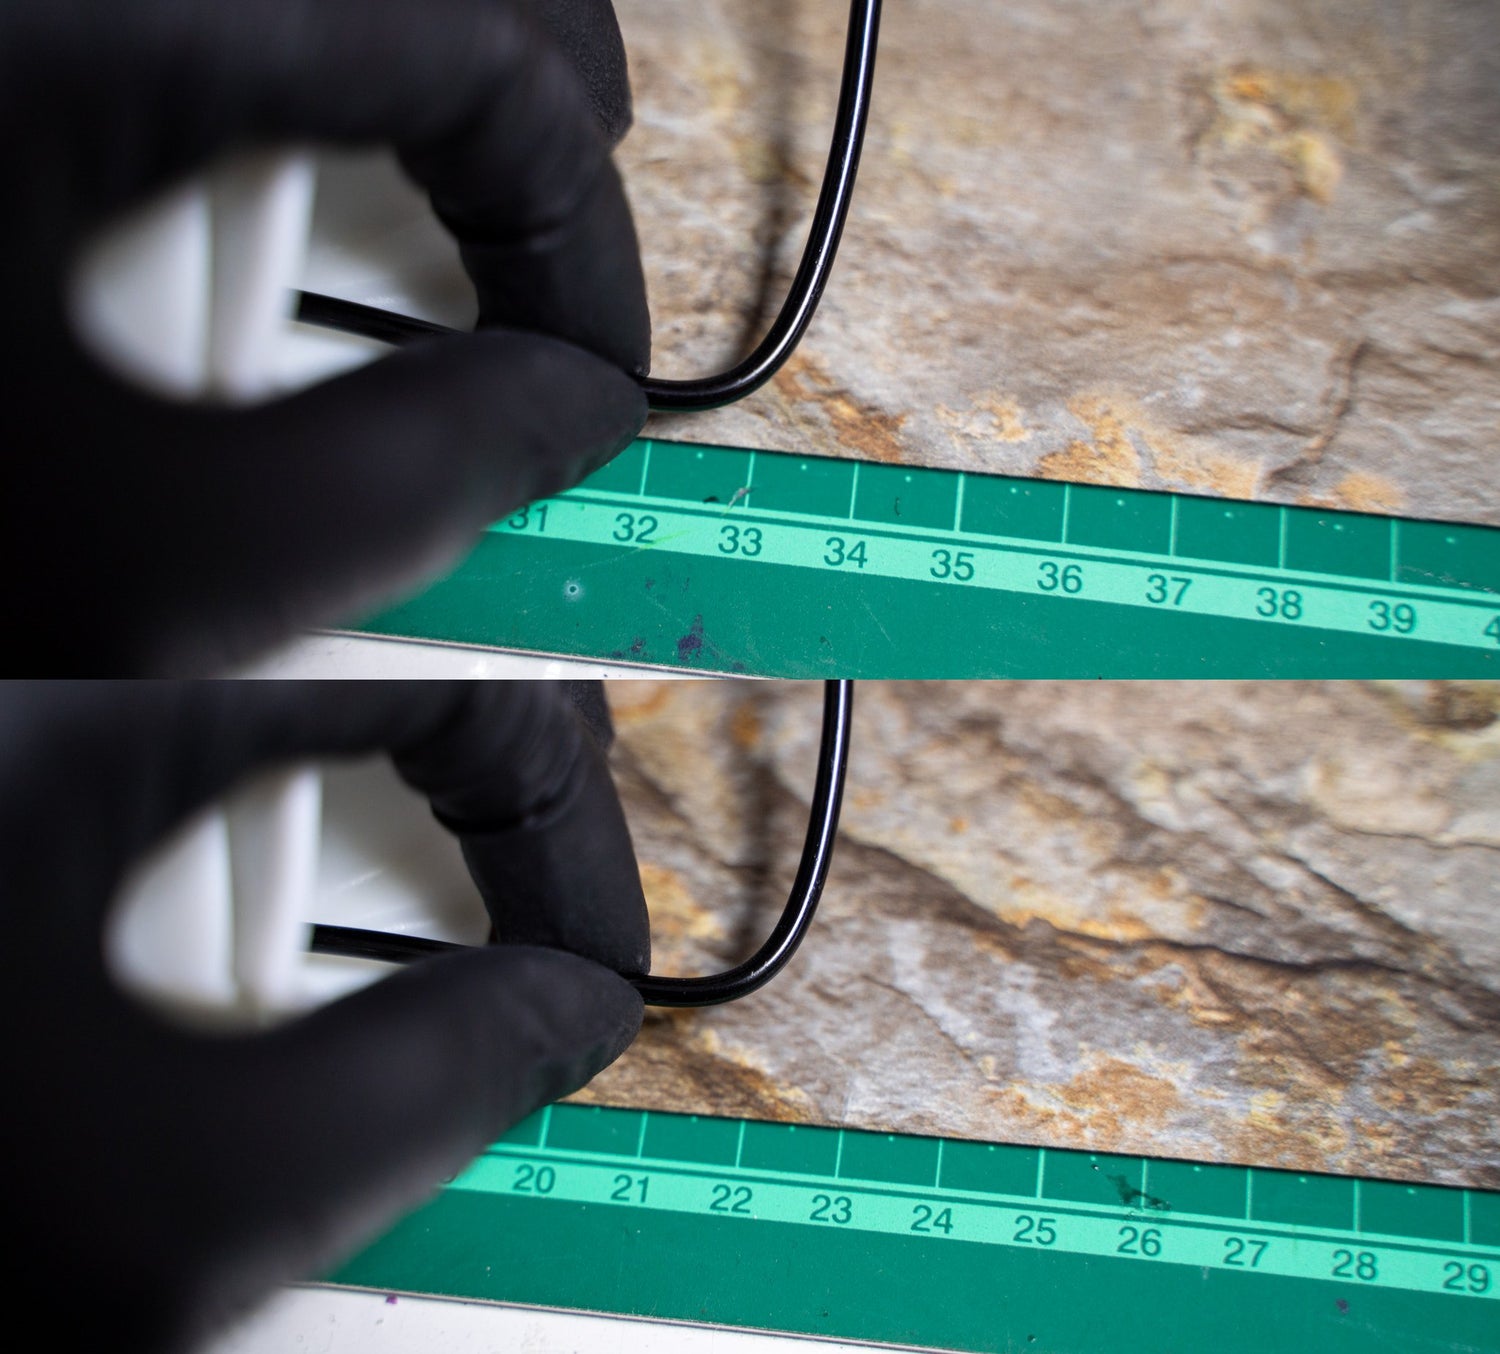
4 /
After putting all parts to the wire, now we do the next step.
For the “Dragon Tail”, twist the wire at about 32~33cm.
For the “Young Dragon Tail”, twist the wire at about 21~22cm.
5 /
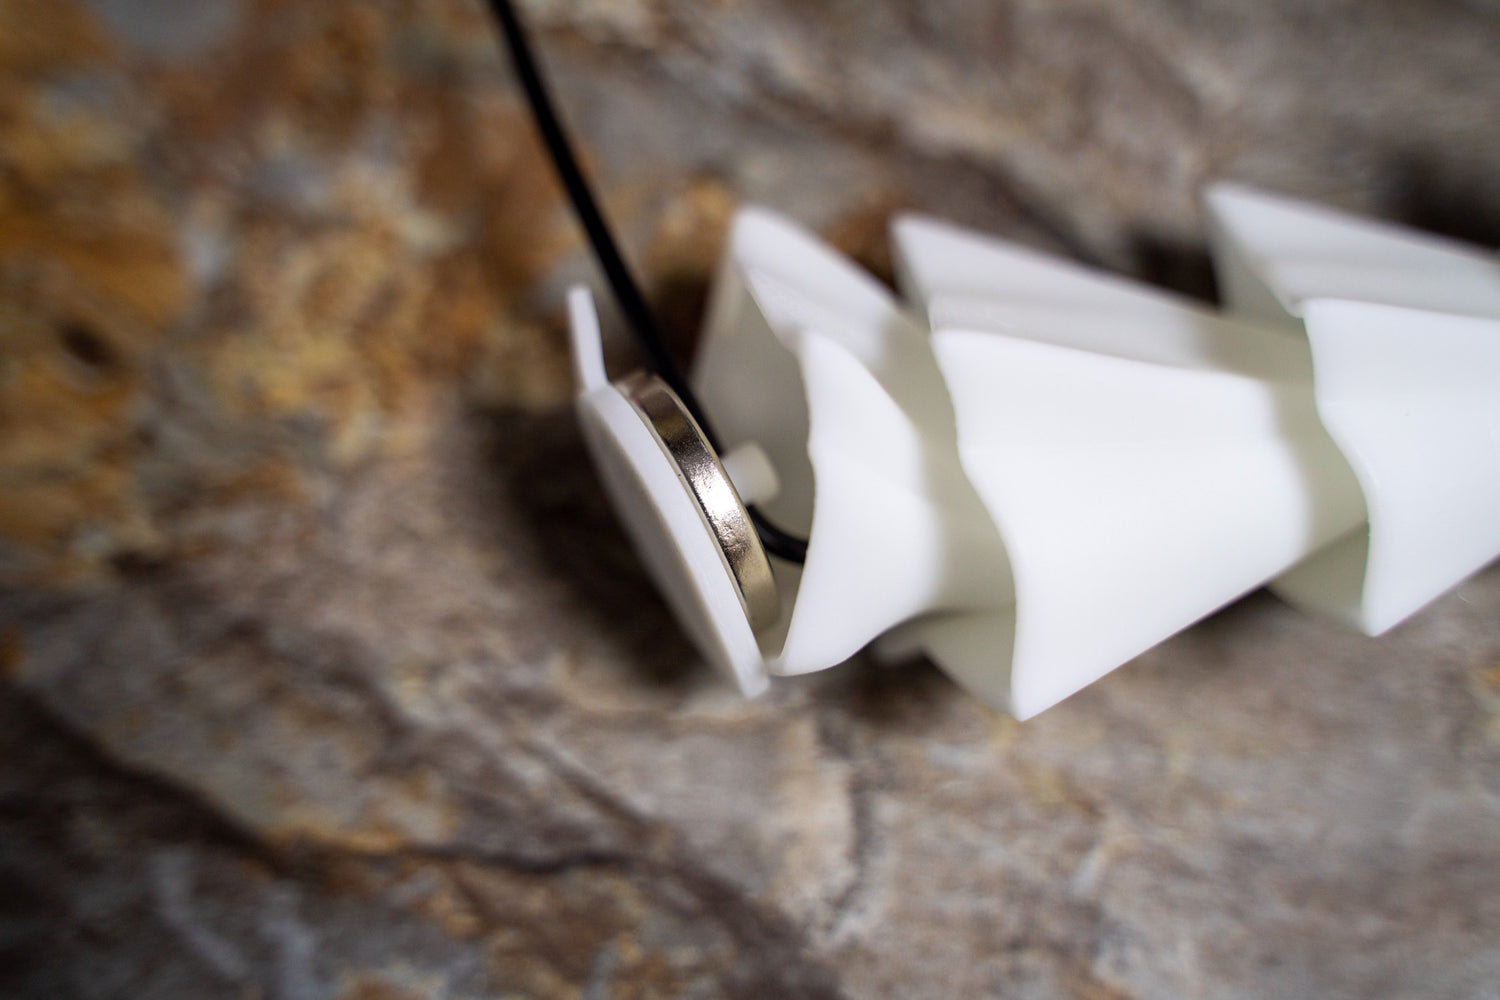
Put the last part (with magnet) to the wire.
6 /
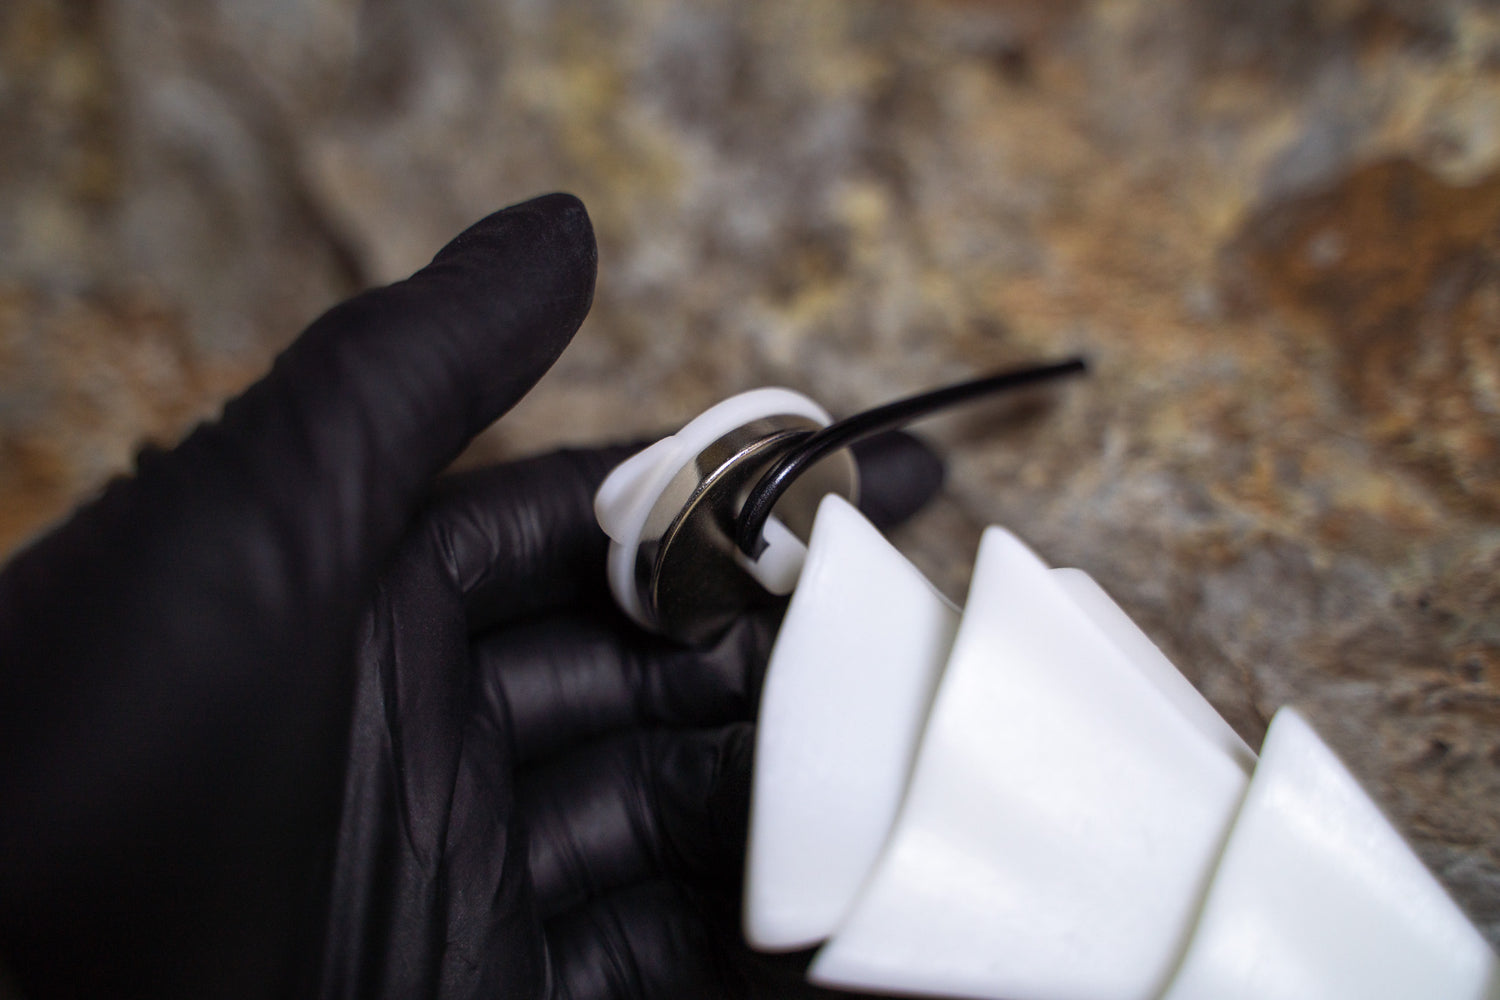
Twist the wire around the cylinder slowly. Be careful to do this step. If you use too much force, the part may break. You can also use the plier to help. (One spare piece included in each pack)
Cut the remain wire if necessary.


7 /
Put it into the latest tail part.
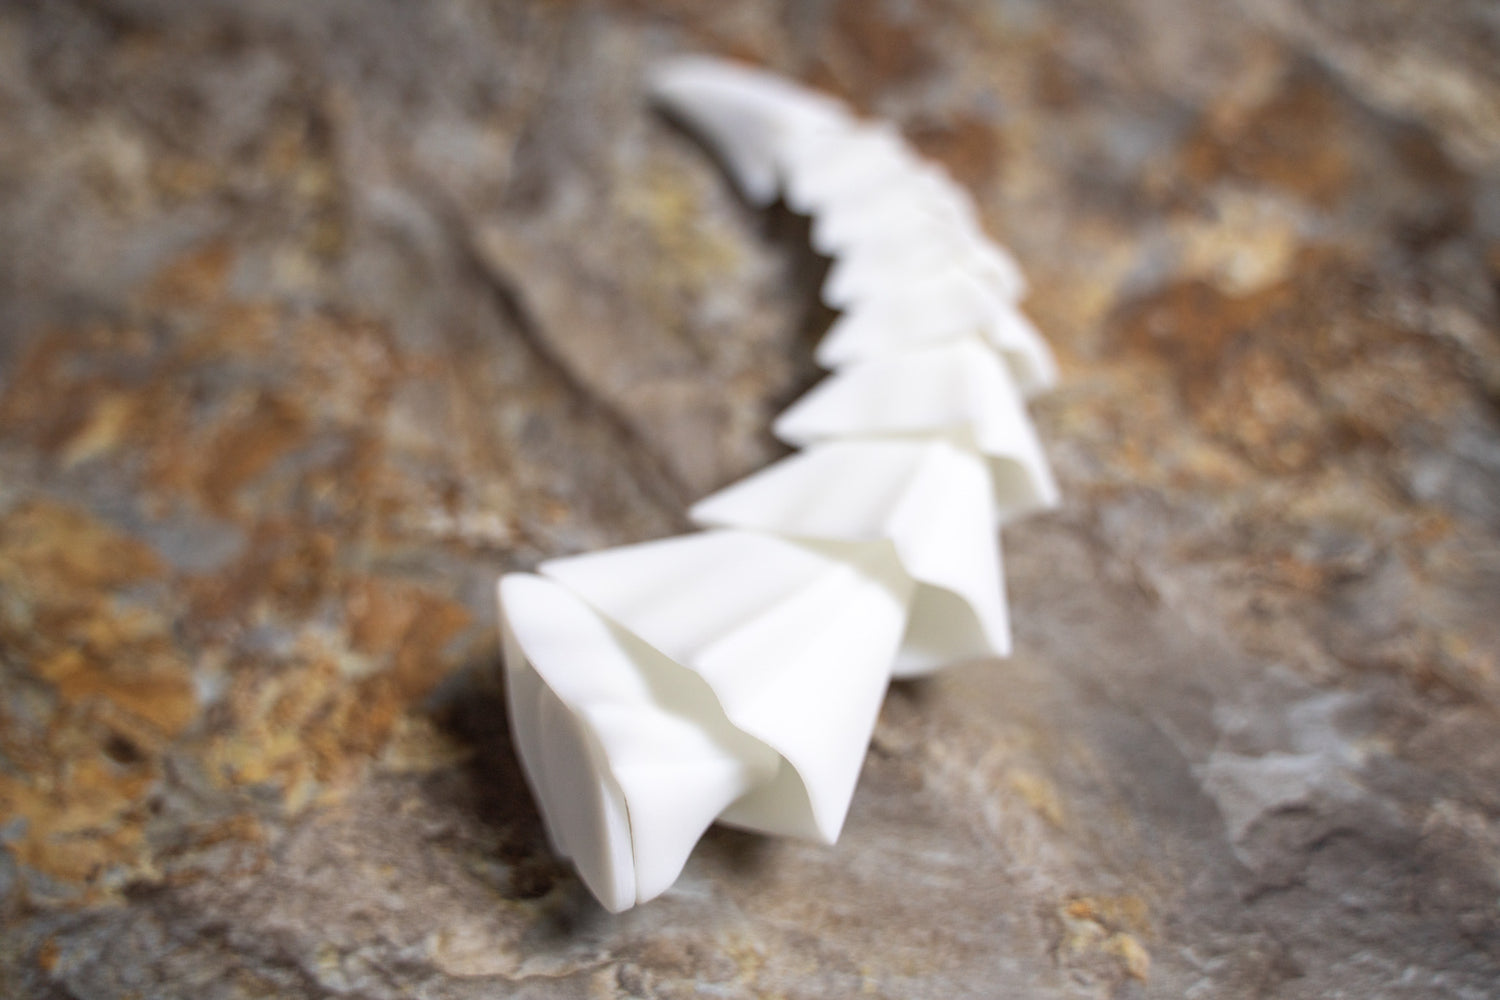
Finished!